Homemade Ranch Dressing: A 2 Cats Recipe

Standard

Ranch Dressing

My windox box sprouting Salad!

My windox box sprouting Salad!

It’s April, which means temperatures are warming, the sun is beaming, my herbs are growing, and the local farmer’s markets are open longer hours with tons of beautiful produce. I love swinging by the market on a sunny Saturday morning to see what’s available. I buy cute little baby potatoes, vibrantly colored cherry tomatoes, and crunchy salad greens. For the first trip of the season, I picked up some fabulous red leaf lettuce, a dill plant, and these truly amazing purple radishes. When I got back home and looked at my haul, I knew I had to make some homemade ranch dressing.

A Big ole bowl of freshly picked farmers market ingredients

A Big ole bowl of freshly picked farmers market ingredients

Ranch dressing is a salad bar staple, not to mention a requirement of the southern table. I really wasn’t a fan of it until a few years ago. I’m not sure why; ranch is tangy, herbaceous and goes well with practically everything! I use it for salads obviously, but I also like to use it as a dip for baby carrots and radishes for a nice snack, and let’s not forget how good ranch is with fried chicken tenders! Pepperoni pizza is also amazing with an added dollop of ranch….don’t knock it until you try it.

Really Mom? Pizza and Ranch??

Really Mom? Pizza and Ranch??

The ranch dressing is a snap to put together. A little herb chopping, some garlic grating (more on that in a minute), a quick bit of stirring and voila, you’ve got a creamy salad dressing that keeps for weeks! You can use the dressing right away, however I’d suggest letting it hang out in the refrigerator for an hour. The flavors get some time to meld and everything becomes more herby and delicious.


My version of ranch forgoes the commonly used buttermilk for a container of sour cream. I don’t know about you, but I rarely have buttermilk in the fridge and always have sour cream. The tanginess from the sour cream is the perfect counterpoint to the creaminess of the mayonnaise.

The Dressing Mix

The Dressing Mix

Garlic is a really important flavor in ranch dressing; I think it adds a little punch of spice. Instead of mincing, I use a microplane to grate a clove of garlic into the dressing. I feel like the garlic is more evenly distributed throughout the dressing this way.  I also like to add a pinch of red pepper flakes for a teeny bit of added heat against the cool dairy base.

My Big Bowl of Salad and Ranch Dressing.

My Big Bowl of Salad and Ranch Dressing.

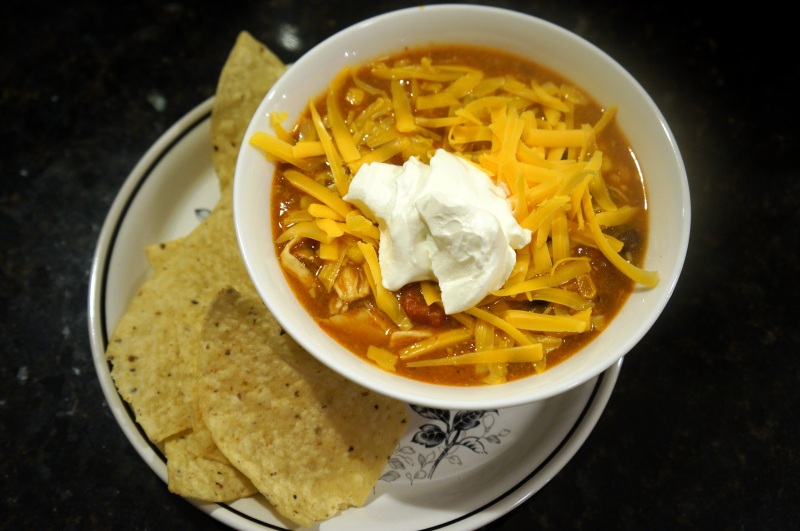
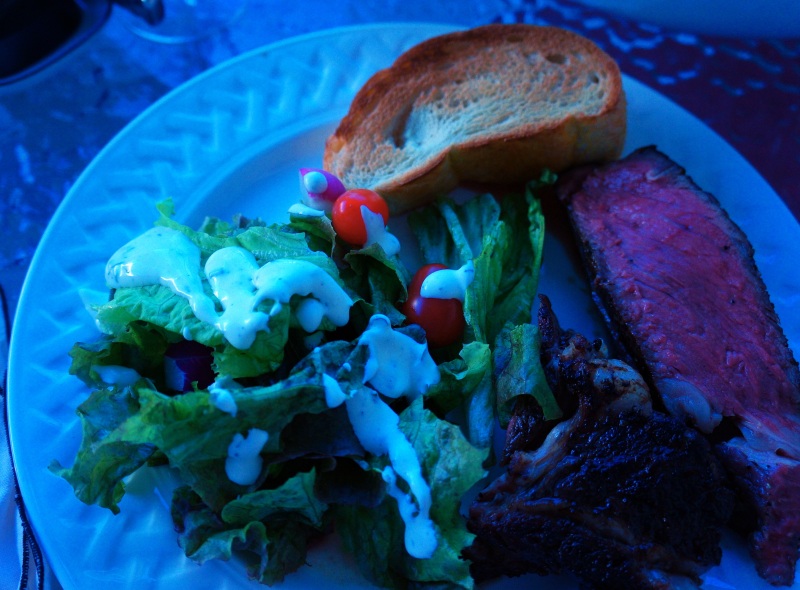
Later Saturday evening, my salad and ranch dressing were served alongside one of Chris’s perfectly cooked steaks and some creamy mashed potatoes. The dressing was perfect! It had a bright tang that contrasted well the richness of the meat. I even found myself adding a few spoonfuls of dressing to my mashed potatoes. It looks like ranch dressing really does go with everything!

The Ranch Dressing Ingredients

The Ranch Dressing Ingredients


Ranch Dressing

Makes about 1 cup

1/2 Cup Mayonnaise

1/2 Cup Sour Cream

2 Tablespoons Milk

1 Garlic Clove, grated

1/4 Teaspoon Kosher Salt

1/4 Teaspoon Black Pepper

1 1/2 Tablespoon Chives, chopped

1 Tablespoon Dill, chopped

A Pinch of Crush Red Pepper (optional)


Stir ingredients together in a bowl until combined. Place in the refrigerator for 1 hour for flavors to meld.

Keely’s Hot Cocoa: A 2 Cats Recipe

Standard

Keely’s Hot Cocoa

My blanket babies

My blanket babies

 Lately it’s been really cold outside; like “I don’t want to leave bed because I’m under 4 fleece blankets with my 2 purring space heaters on top” cold. But alas, I must go to work, teach students, and attempt to be a productive member of society while Tchai and Roz stay snuggled in bed.  Sometimes during the winter, I wish I could trade places with the kitties…though I’m not sure I’d like the same kibble for breakfast every morning or not being able to open doors…

blanketbabies

They are just so cute!

Anyway, when it’s this frigid outside I crave something warm and chocolatey, like hot cocoa. Cocoa is so simple, satisfying, and a cinch to make from scratch (you can be sure there are no Swiss miss packets in this house). Instead of having a whole container of dry mix hanging around in the pantry, I make this drink by the cup. I don’t feel like cocoa is arduous enough to warrant pre-mixing and really there’s not enough storage space for such things in my kitchen.

The cocoa and sugar mixture.

The cocoa and sugar mixture.

The ingredients for cocoa couldn’t be easier; just some sort of dairy, sugar, and cocoa powder. For the dairy I use a combination of whole milk and heavy cream. I love the extra weight and richness the cream brings; it makes the whole thing more filling and more like a dessert.  A quick reminder: never let your milk and cream come to a full boil, it will develop an unappetizing skin. Just look for little bubbles to appear around the wall of your saucepan to know you’re cocoa is ready.

Mixing the cocoa into the scalded milk

Mixing the cocoa into the scalded milk

I tried a few different flavor pairings when putting together my hot cocoa recipe. The traditional vanilla extract was nice but it didn’t knock my socks off. I thought bourbon would be the way to go, but it was a little too boozy for my taste. Finally, I found perfection when I added a splash of Cointreau to my mug of molten chocolate. The citrusy orange liqueur adds a depth of flavor that plays beautifully off the cocoa, making the whole thing even more decadent. I’d suggest using a really good orange liqueur as some of the cheaper ones end up being too sugary.

A splash of the good stuff

A splash of the good stuff

Cocoa topped with tiny pillows of heaven

Cocoa topped with tiny pillows of heaven

Once the chocolatey brew has made it into a mug, top it with whatever you like and serve immediately. Some orange zest speckled whipped cream would be lovely, or you could try a few chocolate shavings.  My inner 8 year requires that my cup of hot cocoa be completely covered in mini marshmallows, and should I really deny that inner child? Once you’ve topped your cocoa, the only thing left to do is find a cozy spot (maybe with a few blankets) and drink in the deliciousness.

cocoasetup

Keely’s Hot Cocoa

(makes 1- 12 ounce cup….or you could share)

1 Cup Whole Milk

1/2 Cup Heavy Cream

2 Tablespoons Granulated Sugar

2 Tablespoons Unsweetened Cocoa Powder

1/2 Tablespoon Good Orange Liqueur (I used Cointreau)

Mix together the milk and heavy cream in a small sauce pan and place on the stove on medium heat. Once the milk is scaled (little bubbles form around the wall of the pot and the mixture is steaming) whisk in the cocoa and sugar. Once everything is thoroughly mixed, removed the pot from the heat and stir in the orange liqueur. Pour the cocoa into your favorite mug and enjoy!

Snug as a Tchai in a blanket (I know that's not the way it goes, but when the shoe fits...)

Snug as a Tchai in a blanket (I know that’s not the way it goes, but when the shoe fits…)

Homemade Sausage Gravy: A 2 Cats Recipe

Standard

Sausage Gravy

Pride, Prejudice and Zombies...an instant classic?

Pride, Prejudice and Zombies…an                       instant classic?

Valentine’s Day is this coming Sunday, so I thought I’d talk about the things Chris and I do for love and eachother. Last weekend my fiancée went with me and a few friends to see the movie “Pride, Prejudice, and Zombies”. Now as you can imagine Chris had absolutely zero interest in the film, but he went without protesting or complaining after the movie was over (Side Note: The movie is super fun and Matt Smith as Mr. Collins is the highlight).  Since Chris did something just for me, I thought it was only fair that I reciprocate. I decided that I would make a very special breakfast for dinner that night.

..Yep, they came from a can...don't judge me...

..Yep, they came from a can…don’t judge me…

 I don’t know about you, but I love breakfast for dinner. Scrambled eggs, crispy bacon, toast, and cheese grits… why only eat it one specific time of day? My love of breakfast for dinner began when I was a kid and my parents would cook bacon and eggs at night every few months. Once I got into college and started cooking for myself, quiche and cheese grits became part of the regular dinner rotation. And finally when Chris and I began living together, we indulged in breakfast for dinner every few weeks. Eventually, we started eating less and less breakfast at night, but every once and a while for a treat we still break out the frying pan for scrambled eggs in the evening.

The cooked breakfast sausage, mmm porky

The cooked breakfast sausage, mmm porky

In my opinion, sitting through a Regency era zombie movie deserved an extra special meal so I decided to try making my own sausage gravy from scratch.  One of Chris’s favorite things to order when we go out for breakfast is biscuits and gravy and to be honest, I’d never eaten it until I made it myself! I don’t know why, but the idea of making gravy was intimidating. I think it’s because Chris likes is so much and I don’t want to screw it up.  After a little online research I realized that making gravy is just like making a béchamel or white sauce. Once armed with this knowledge, I felt confident I could cook a delicious gravy.

The gravy roux, cooked and waiting for the milk

The gravy roux, cooked and waiting for the milk

The gravy bubbling away, getting thick and delicious

The gravy bubbling away, getting thick and delicious

My recipe for sausage gravy takes only a handful of ingredients and no time at all. Seriously, in the minutes it takes to bake off some canned biscuits (homemade biscuits are intimidating too!) the gravy is waiting in my cast iron skillet for something to smother. The gravy is creamy, thick, salty from the pork, and super delicious.  I actually really enjoyed it and would probably not mind having it once a month for Sunday breakfast.

sausageandgravy

The true test for the gravy was my sweetheart, and he seemed super pleased. He commented that it was a little bit too thick, but an additional tablespoon of milk would easily fix the issue (or not letting it cool so much before serving).  Chris liked it so much that he had the leftovers for breakfast the next morning, which in regards to cooking, is the highest compliment I can achieve.

This breakfast is great for Valentines morning and breakfast in bed. If it’s like my house though, you’ll have two little faces waiting for the gravy leftovers!  And on that note, I hope everyone has a lovely Valentines weekend!

sausagegravysetup


Homemade Sausage Gravy

(Serves 3-4)

3/4 Pound Mild Breakfast Sausage

1/4 – 1/3 Cup Flour

2 Cups Milk (I used whole, but whatever you have)

2 Big Pinches Kosher Salt

30 – 40 Turns fresh Black Pepper

1 Pinch Crushed Red Pepper Flakes

Brown the sausage in a skillet, breaking it up into chunks. Once cooked, remove the sausage with a slotted spoon and transfer to drain on a paper towel. Remove a few spoonfuls of the cooking fat until about 1/4 cup remains. Add flour and whisk for 2-3 minutes until the flour is slightly cooked but not browned. Add in the milk and whisk for 3-5 minutes until the gravy is thickened to your liking and bubbly. Remove skillet from the heat and add salt, pepper, red pepper flakes, and sausage. Mix to combine and serve over biscuits while still warm.  

Chicken Enchilada Soup: A 2 Cats Recipe

Standard

Chicken Enchilada Soup

My kitty sicknurses....hard at work

My kitty sicknurses….hard at work

The end of January has brought cold, nasty weather and a gnarly case of the sniffles to North Carolina. Yep, that’s right; this blogger is getting over a cold.  I took a few days off this week to rest and recover under the direct supervision of my two favorite sick nurses. The first night my wonderful fiancée made my guilty pleasure for dinner, blue box macaroni and cheese. The second night I was starting to feel better so I decided to get up, stop being a slug, and make Chris and myself soup.

A drained portion of the canned veggies for the soup

A drained portion of the canned veggies for the soup

Chicken, chilies, tomatoes and enchilada sauce all in a pot

Chicken, chilies, tomatoes and enchilada sauce all in a pot

I chose to make my hearty and fufilling chicken enchilada soup. It’s perfect for a wintry day or when you don’t feel like exerting a lot of effort…or both in this case. This recipe is more about ingredient assembly than cooking and all it takes is 15 minutes of effort, a can opener, and a slow cooker. The soup simmers away in the pot for 6-8 hours, making it an easy dish to start one morning before you get to work (or around noon if you’re deeply involved in a “Miss Fisher’s Murder Mysteries” marathon).  This recipe is a crowd pleaser and has something for everyone; heaps of shredded chicken breast, hearty black beans, sweet corn, plump tomatoes, and a perfectly flavored soup base of broth, enchilada sauce and cumin.  I adore cumin; it’s nutty and warm and gives everything a wonderful depth of flavor. It’s the most used spice in my drawer, the soup wouldn’t be as stellar without it.

Soup pre-slow cooking

Soup pre-slow cooking

After 6 hours (and some chicken shredding) yummy warming soup!

After 6 hours (and some chicken shredding) yummy warming soup!

Once the chicken enchilada soup is completed, I’ve got a meal that stuffs Chris and I both, but also supplies leftovers for the next few days. The soup gets better the longer it sits and can be topped with all sorts of goodies. My favorite combination is cheddar, sour cream, and a little bit of Thai chili paste. This soup is really great for weeknight entertaining as well; just serve it with some tortilla chips and a toppings bar and you’re set. My favorite way to eat this soup however, is sitting under a fuzzy blanket, watching television with my two favorite space heaters.

Who ya calling a heater? I'm a supportive loving feline.

Who ya calling a heater? I’m a supportive loving feline.

Go away, you're interrupting my 20 hours of beauty sleep

Go away, you’re interrupting my 20 hours of beauty sleep

Chicken Enchilada Soup

Chicken Enchilada Soup Ingredients

Chicken Enchilada Soup Ingredients

2 pounds chicken breast

1.5 cups chicken broth

1 (15 ounce) can black beans, rinsed and drained

1 (15 ounce) corn, drained

1 (4 ounce) can diced green chilies

1 (10 ounce) can red enchilada sauce

1 (14.5 ounce) can diced tomatoes

1 heaping tsp. cumin

¼ tsp kosher salt

1 pinch red pepper flakes

1 (16 ounce) can refried beans


Add chicken to slow cooker. Cover with the broth, beans, corn, chilies, enchilada sauce, tomatoes, cumin, red pepper flakes and salt. Stir everything until mixed. Cover and cook on low for about 6-8 hours. Remove the chicken and shred.  Stir refried beans into the hot soup until creamy.  Add chicken back into the slow cooker and ladle the soup into bowls. Top with your favorite things.

A bowl of the good stuff

A bowl of the good stuff

Mom’s Cuba Dip: A 2 Cats Recipe

Standard

Mom’s Cuba Dip


I hope you and yours had a wonderful holiday last week. My fiancée and I made the nine hour drive to my hometown in South Georgia to spend Christmas with my parents. Because of the distance we decided to leave our kitties in North Carolina in the care of a sitter. Luckily, we were not completely devoid of feline attention; we had Merlin.

Merlin

Merlin

Merlin has been my parent’s cat for the last five years in which time he’s become super spoiled. You should’ve seen the size of his stocking! In the mornings Merlin loves to cuddle. He’s very demanding about his snuggles, head-butting you if you stop scratching him before he’s ready. Merlin makes being away from Tchai and Roz a little more tolerable.

Cuddling/Annoying Merlin

Cuddling/Annoying Merlin

My mom and I at my godmother's home in Georgia before a UGA game

My mom and I at my godmother’s home in                    Georgia before a UGA game

Since I was home I thought it was a perfect opportunity to cook something with my mother for the blog. Mom is a fabulous cook though she calls herself a “good recipe follower”. I didn’t actually get to cook with her that often as a child or teenager because Mom is very particular about her kitchen and doesn’t like too many people in it. Her kitchen is the place where my mom destress and she passed those qualities on to me.

Cooking Separate, but together

Cooking Separate, but together

 I’ve chosen one of her signature recipes; something my Mom does better than anyone else. Whether it’s tailgating in Athens or watching the Dawgs in front of the T.V., my Mom’s famous Cuba dip is a Phillips family football staple. Mom has made this dip for every UGA football game that I can remember. I’m not sure why it’s called Cuba dip and Mom isn’t either. Unfortunately we believe the cookbook with the original recipe was donated, so I guess we’ll never know.

browning meat and onions for the dip

browning meat and onions for the dip

This recipe is usually made in the crock pot but this time mom pulled out her dutch oven to speed the process along. Both methods are great and the ingredient list is the same for either. The crockpot takes around 2 hours while the stovetop takes 20-30 minutes. I prefer the crock pot, because of tradition, but if you’re short on time the stovetop method works just as well. The ingredients for this dip…. well aren’t exactly found on any clean eating lists, but as mom says “there is no substitute for Velveeta”.

Velveeta, no other words needed

Velveeta, no other words                           needed

melty Cheeeeeese

melty Cheeeeeese

Once the dip is all melted together it’s addictive. For some reason as a teenager, I didn’t like the ground beef/sausage version and Mom graciously made a veggie version for me and my godmother, Joye. Now I can’t believe what I was missing! The meat counterbalances the nuclear yellow cheese product and makes this dip super hearty. Mom always uses the mild Rotel but you can use any heat/spice level you want.  Make sure you have lots of tortilla chips handy you’ll be surprised at how quickly this dip goes.

mixing the beef and cheese together

mixing the beef and cheese together

Almost done, just missing the sausage.

Almost done, just missing the sausage.

At the beginning of football season Mom makes a double batch of Cuba dip, portions it into containers, freezes it, and pulls out a container whenever she needs. The double batch makes it through most of the college football season and it’s just as good each game.  I’m planning on whipping up a batch for Super Bowl Sunday to continue the family tradition of having a perfect dip.

dipping

Mom’s Cuba Dip

The ingredients minus the beef and sausage

The ingredients minus the beef and sausage

1 ½ lbs. Ground Beef

1 lb. Breakfast Sausage

½ Large Yellow or Vidalia Onion, diced

2 lbs. Velveeta, cubed

1 can Cream of Mushroom soup

1 can Rotel Tomatoes w/ chilies

½ teaspoon Garlic Powder

Brown the ground beef with the chopped onions and drain in a colander when cooked. Brown the sausage in the same pan and drain. Add the cooked meats into the crock pot. Add the Velveeta, mushroom soup, Rotel, and garlic powder into the crockpot. Turn the crockpot on high until all the ingredients are melted together. Once melted, turn the dip to low and serve with chips.


**For the stovetop, melt the Velveeta while you’re browning the meat. Then add the browned meat and remaining ingredients to the melting cheese.  

Black Magic Cake: A 2 Cats Recipe

Standard

Black Magic Cake


                This past week was a cause for celebration. It was the last week of classes before summer, which meant a performance of “Jabberwocky” for my 10 year olds and villain monologues for my teenagers. On top of that, two of my students are graduating from high school and beginning their journeys into adulthood (*ahem* I will not get sentimental….). Well, celebrations like these call for cake!  I chose to make the best cake in my repertoire, a black magic cake.

The cake line up

The cake line up

Half the black magic duo, coffee

Half the black magic duo, coffee

Black magic cake is my go to chocolate cake recipe. It’s fluffy and darkly delicious combining two of the best ingredients on earth: chocolate and coffee. This cake appeals to 10 year olds, teenagers, and their moms alike. Additionally, it’s super quick to mix together and doesn’t require the use of a stand mixer, just a good sized bowl and whisk. The recipe was originally developed by the Hershey Company around the 1950’s. My version has a few tweaks here and there, like a little more flour and espresso powder.

The dry ingredients

The dry ingredients

the cake about to head for the oven

the cake about to head for the oven

                I made the cake the morning of my last class between trips to urgent care and the pharmacy (Chris was incredibly sick for the first part of the week L). It took 10 minutes to get the batter mixed and the cake into the oven. Don’t worry about the consistency of the batter when you go to bake it; it is supposed to be really wet. Thirty-five minutes later (or a laundry sorting/ cat photography session later) you have a warm, gooey chocolate cake cooling on the counter waiting to be smothered in icing.

A picture from Tchai's photo session

A picture from Tchai’s photo session

How could you not love that face?

How could you not love that face?

I choose to top my cake with a chocolate powdered sugar icing. The super sweet icing helps compliment the dark chocolatey-ness of the cake. I also add a little espresso powder to the icing to give it an additional coffee kick.

A Gob of icing on the cooled cake. Yum!

A Gob of icing on the cooled cake. Yum!

My cake warning :-)

My cake warning 🙂

                Once the cake was completed I packed it up (with a do not touch warning) left for work, expecting half the cake would make it back home. Unfortunately for me (and Chris) only three pieces of cake made it home. It’s a super-rich cake, so a little goes a long way…but a few students liked it so much they had seconds (and possibly thirds)!  Clearly this cake is a crowd favorite; hopefully it will become a favorite of yours as well.

DSC09724

Black Magic Cake

2 cups sugar

2 cups all-purpose flour

3/4 cup Cocoa

2 teaspoons baking soda

1 teaspoon baking powder

1 teaspoon salt

2 eggs

1 cup buttermilk

1 cup strong black coffee

1/2 cup vegetable oil

1 teaspoon vanilla extract

1/4 teaspoon instant espresso powder

Pre-heat the oven to 350 Degrees. Combine all the dry ingredients (flour, sugar, cocoa, baking powder, baking soda, salt, espresso powder) into a large mixing bowl. Mix the dry ingredients well. Add buttermilk, coffee, eggs, oil, and vanilla and whisk everything to combine. Pour batter into a 9 x 13 baking dish and place in the middle of your oven. Bake for 35 minute or until a cake tester comes out clean. Leave cake to cool to room temprature before icing.


Chocolate Icing

1 stick unsalted butter, softened

2 ounces unsweetened chocolate, melted and cooled

4 tablespoons milk

2 1/2 cups Powdered Sugar

1 teaspoon Vanilla extract

1 teaspoon Instant Espresso Powder

Combine butter, chocolate and milk in a medium sized bowl. Using a hand mixer, mix the butter and chocolate until combined. Add 1/2 the powdered sugar and mix until well blended, then add the remaining powdered sugar, vanilla and espresso powder. Mix with the hand mixer until the icing is thoroughly combined. Spread on cooled cake or eat with spoon. 


Bacon and Spinach Quiche: A 2 Cats Recipe

Standard

Bacon & Spinach Quiche

May turned out to be an insanely busy month. There was our annual spring ballet and all of the preparation, a new floor installed in the studio, my birthday, and finally an exciting unexpected delivery to our house.

My delivery was a upright piano!

My delivery was a upright piano!

Me playing my new baby. I am so excited about this!!

Me playing my new baby. I am so excited about this!!

I tried to keep up with everything: taking care of the kitties, keeping the house clean, occasionally interacting with my boyfriend, and blogging. I tried to cook and write posts, I really did….but I failed and was not able to finish anything. I’m pretty sure there was an entire week without cooking, AT ALL (Blasphemy for a food blogger). But summer is now underway and I can yet again attempt to settle back into a regular cooking and writing schedule.

Frying bacon, one of the prettier sights in our home

Frying bacon, one of the prettier sights in our home

When my schedule becomes that hectic, I try to fall back on cooking meals that are second nature and will last for several days. One of my favorites is quiche. I find it very versatile; it can be served at any temperature for any meal without feeling forced (like leftover pizza). It isn’t fussy and really only requires eggs, pie crust, and some sort of milk/cream. The filling is totally whatever you’re in the mood for (and/or what’s in the refrigerator).

The parts of the quiche are about to be assembled

The parts of the quiche are about to be assembled

I really like quiche for entertaining guests as well as for my personal enjoyment. I think over the past five years quiche is by far the most commonly served item we have company for breakfast/brunch. I know of at least one co-worker who is a huge fan. If I tell her I’m bringing in leftover quiche, she walks into work with fork in hand.

The bottom layer of the quiche. Spinach, bacon and cheddar...yum!

The bottom layer of the quiche. Spinach, bacon and cheddar…yum!

The quice pre-oven. Eggs and cheddar go over the bottom layer

The quice pre-oven. Eggs and cheddar go over the bottom layer

The quiche recipe takes about an hour from start to finish. As I’ve stated earlier, the filling possibilities are numerous and up to the cook. I have included my most often used filling for this recipe. I believe this is a classic combination. I think its Chris’s favorite combo as well (though I’m sure he’d be happy with no green stuff whatsoever). I am sure Roz and Tchai could join Chris and forgo the green ingredients.

The finished quiche

The finished quiche

Bacon and Spinach Quiche

Ingredients set up

Ingredients set up

Makes one 9-inch deep dish quiche

1 – 9 inch Deep Dish Pie Crust

3/4 Cup Heavy Cream

6 Eggs

4 Slices Bacon, cooked and crumbled

a Pinch of Salt

20 Grinds Black Pepper

1/8 teaspoon freshly ground nutmeg

4 Ounces Shredded Cheddar Cheese

1/2 Cup Frozen Spinach, defrosted and the Water squeezed out

 Pre-heat the oven to 400 Degrees. Place the pie crust in the pre-heated oven and partially bake for 7 minutes. While the crust is baking, whisk the eggs, cream, salt, pepper, and nutmeg together. Pull the pie crust from the oven and let cool for a minute or two. Layer the bacon, spinach, and half the cheese on the bottom of the crust. Pour egg mixture over bacon, spinach, and cheese mixture. Top the quiche with the remaining cheddar. Bake at 350 degrees for 35 – 45 minutes until the quiche is settled.

Coffee Ice Cream: A 2 Cats Recipe

Standard

Coffee Ice Cream

I’m going to start this post with a confession: I am a coffee addict. I’ve been drinking the stuff since I was 15 years old, thinking that by doing so I’d look all cool and mysterious. When I was in college I was living off mochas and café au laits. Though I don’t take my coffee black, I do appreciate a good dark french roast. There’s almost nothing better in the world than a beautiful Sunday morning sitting on my back porch with a good cup of joe watching the kitties wander around and attempt to eat the herbs.

But Moooom, I want to eat the daisy!

But Moooom, I want to eat the daisy!

Up close Roz shot

Up close Roz shot

As much as I love coffee I can’t say that I ever have a craving for coffee flavored desserts, especially ice creams. When I’ve tried grocery store versions I find they’re either too sweet, don’t have enough coffee flavor, or both problems at the same time. Since I had the technology (and the craving), I decided I’d give making my own coffee ice cream a shot. (No pun intended)

The players in this recipe

The players in this recipe

I started by using Hugh Acheson’s vanilla ice cream recipe as a base and repurposed it to create my own creamy coffee treat. The recipe appealed to me because of its steeping process. I think steeping the coffee beans in the milk mixture makes all the difference in flavor. The little kick of espresso powder is nice, but really it’s all about those beans. There’s no need to buy anything fancy for this recipe, I just used our regular every morning coffee beans and was very pleased with the results.

steeping beans

steeping beans

Look at these duck yolks, THEY'RE HUGE

Look at these duck yolks, THEY’RE HUGE

I was lucky enough to have some wonderful duck eggs on hand from my friends at Darko Farm. Duck egg yolks are quite a bit larger than their chicken counterparts so you don’t need to use as many eggs for this recipe. I think they actually made the dessert creamier and more luscious. If you’re able to get duck eggs, I totally recommend them here.

The ice cream making process is a bit time consuming. There are several inactive steps that take anywhere from 30 minutes to 3 hours. I found that this was a good recipe to make one afternoon whilst I was doing some deep spring cleaning. Whipping egg yolks and cooking custard were nice stress-free activities between the miserable dusting and mopping sessions.

making the ice cream custard

making the ice cream custard

When I tasted the ice cream it made me think of my morning cup of coffee, which was exactly what I hoped for. I really like this recipe, as does Chris. We both put a little chocolate syrup on our dessert servings that evening which leads me to believe that some chocolate chips or covered espresso beans would go really well folded into the ice cream.  I think it will be a regular afternoon treat while I sit outside on the porch and keep the kitties away from our daises.


The ice cream after its finished churning. Yum!

The ice cream after its finished churning. Yum!

Coffee Ice Cream

(Makes a little over 1 pint)

1 2/3 Cup Whole Milk

½ Cup Heavy Cream

1/3 Cup white sugar

1/3 cup whole coffee beans

1 teaspoon instant espresso powder

A pinch of salt

 2-3 egg yolks, depending on size


In a medium mixing bowl combine milk, cream half the sugar, salt and espresso powder. Once combined well add the coffee beans and pour mixture into a medium saucepan. Heat the saucepan on medium heat for 6-8 minutes, until the mixture starts to steam.  Turn off the heat, put a lid on the pan, and steep the milk mixture for at least 30 minutes.

In another medium bowl whisk the egg yolks and remaining sugar until fluffy and pale yellow. Slowly temper the yolks by mixing in the steeped milk. Do this gradually or you’ll have scrambled eggs. Once tempered (when at least 2/3 of the milk mixture is mixed with the yolks) pour in all the milk mixture and whisk to combine. Strain out the coffee beans and place the egg and milk mixture back in the medium saucepan on the stove. Cook on medium-low heat, stirring constantly with a spatula until the mixture becomes thick enough to coat the spatula, approximately 10 – 12 minutes.

Once thickened, place the ice cream mixture in the fridge to cool down, this should be at least 3 hours. Once the mixture is cooled, add it to your ice cream make and follow directions. Once the ice cream maker is done, put the  ice cream in the freezer for an hour. Then enjoy!

Slow Cooker Chili: A 2 Cats Recipe

Standard

Slow Cooker Chili


It’s been really cold for the past two weeks in North Carolina. Being raised in South Georgia, I am not a fan of being cold. There are six blankets currently on our bed and I rely on my two furry space heaters to stay warm throughout the night. The only time I find winter weather acceptable is when there’s snow, unfortunately there’s only been dreary wind, rain and the occasional bit of sleet. I was slightly hoping for a small portion of “Snowmaggedon” to make its way down to us but alas, no such luck. The only solution for weather this miserable is warm, hearty comfort food.  My choice for this week (since it’s the Superbowl time of year) is my very own slow cooker chili.

Chili, after cooking 8 hours (and Chris getting home first)

I can’t remember eating a lot chili before meeting Chris. As I’ve stated in previous posts, my sweetheart is a lover of red meat, so I’ve adapted my diet to be more carnivorous. Chili should be cooked for a long time to let the flavors develop and deepen, which is why a slow cooker is ideal for this meal.  Can I just take a moment to say how much I love my slow cooker? This one piece of culinary equipment has made my life so much easier.  I teach fairly late one night a week and that evening’s meals are pretty much always made in the slow cooker.

Ingredients shot

I’ve adapted this recipe from one I found on myrecipies.com. I really like the simplicity of just meat, a few veggies, and beans. I used a red bell pepper to add more sweetness & crispness which I think goes really well with the sharpness of the canned tomatoes. The longer it simmers, the better the chili becomes (and it’s really yummy the next day). Chris calls this recipe perfect, which is amazing; since I can’t remember the last meal he praised that highly. I top my chili with shredded cheese, sour cream and sriracha while Chris loads his up with cheese and frito’s (or crackers if frito’s are not available).

After a bowl or two of this chili, I think you’ll be ready for any winter activity; ice hockey, snow sledding, or (if there’s still been no snow) cuddling in front of a good movie at home.

 my bowl of goodness


Slow Cooker Chili

(serves 6)

1 – 1.25 LB Ground Beef (I use Sirloin)

1 Red Bell Pepper, diced

2 Garlic Cloves, minced

½ Sweet Onion, diced

2 Cans Dark Red Kidney Beans, rinsed and drained

2 cans Diced Tomatoes

3 Tablespoons Medium Heat Chili Powder

1 Teaspoon Cumin

1 Teaspoon Salt

½ Teaspoon Black Pepper

Cook ground beef, bell pepper, garlic and onion in a skillet until the beef is cooked through. Meanwhile, add beans, tomatoes, chili powder, cumin, salt and pepper in to the slow cooker. Once the beef is cooked add the skillet contents to the slow cooker. Mix everything together and cook the chili on low for at least 6 hours, 8 or 9 is better. Serve with your favorite toppings


Tomato Soup: A 2 Cats Recipe

Standard


Tomato Soup

mmmmm a bowl of perfection

mmmmm a bowl of perfection

My recipe card, its gone through some alterations

My recipe card, its gone through some alterations

To me, tomato soup is a pretty perfect meal. It’s good in the summer as a refreshing lunch with salad or in the winter piping hot with an oozy grilled cheese for dinner. It’s simple, inexpensive to make, and has become one of my go-to meals. I developed my own tomato soup recipe while at college in South Georgia.  There was a month or two after it was perfected where I made a batch once a week, I loved it so much. I probably would’ve made soup for that entire semester if my roommate hadn’t asked me to lay off it for a while. (She also was eating the soup every week I made it and said after 6 weeks she was burnt out on tomatoes)

DSC08759

His and Her bowls of soup. Chris has the cheesey bowl, I have the fresh thyme

I have yet to meet anyone who doesn’t enjoy tomato soup. It’s one of the meals Chris gets excited about when I tell him it’s on the menu. I think one reason it’s a crowd pleaser is that you can add so many different toppings to the soup and enjoy the outcome. My usually topping is parmesan cheese, but I’ve done bacon, sour cream, and herbs all with great success. At some point, I’d like to go the elementary school route and put Goldfish crackers on top of my tomato soup. 😀


As odd as it sounds, tomato soup was the gateway into regular home cooking for me. Making this soup made me realize how easy it was to cook my own food in an hour or less. I felt so empowered by coming up with my own recipe that I wanted to share it with everyone. I hope you try making this work week appropriate meal and find it pretty perfect too!

An action shot; me using my handy-dandy immersion blender

An action shot; me using my handy-dandy immersion blender

Tomato Soup

The ingredients set out all   food stylist-y

The ingredients set out all food stylist-y

(makes 4 -5 servings)
4 Tablespoons Olive Oil
3 Carrots, chopped
4 Celery stalks, chopped
3 garlic cloves, lightly minced
5 Tablespoons All-Purpose Flour
4 Cups Chicken Broth
1 Can (28 Ounces) Crushed Tomatoes
½ Tablespoon Dried Thyme
Salt and Crushed Red Pepper Flakes
¾ Cup Heavy Cream

Heat olive oil over medium heat in large stockpot. Add carrots, celery, and garlic and cook for 7-8 minutes. Stir in flour and cook until the flour is no longer raw, about 2 -3 minutes. Pour in broth and crushed tomatoes and mix thoroughly. Bring to a boil and season with a pinch of salt, red pepper flakes, and dried thyme. Cover the pot, lower heat to medium low and simmer for 20 – 25 minutes, stirring occasionally. Once the mixture has cooked, blend it in batches in a regular blender or in the stockpot with an immersion blender. Return the mixture to the pot (if blending in a stand blender) and mix in the heavy cream. Bring the soup back up to temperature and serve.

Yum!

Yum!